PDR Mechanics Explained: Leverage, Tip Control, and Avoiding High Spots
Great PDR is controlled force application. Tools don’t “remove dents”; they help you deliver repeatable micro-movements with stable support and consistent tip control.

3.1 Leverage: rod length and brace point
A rod behaves like a lever. Changing the brace point changes effective leverage and tip movement. If the tip feels “jumpy,” reduce leverage by adjusting support, angle, or rod choice.
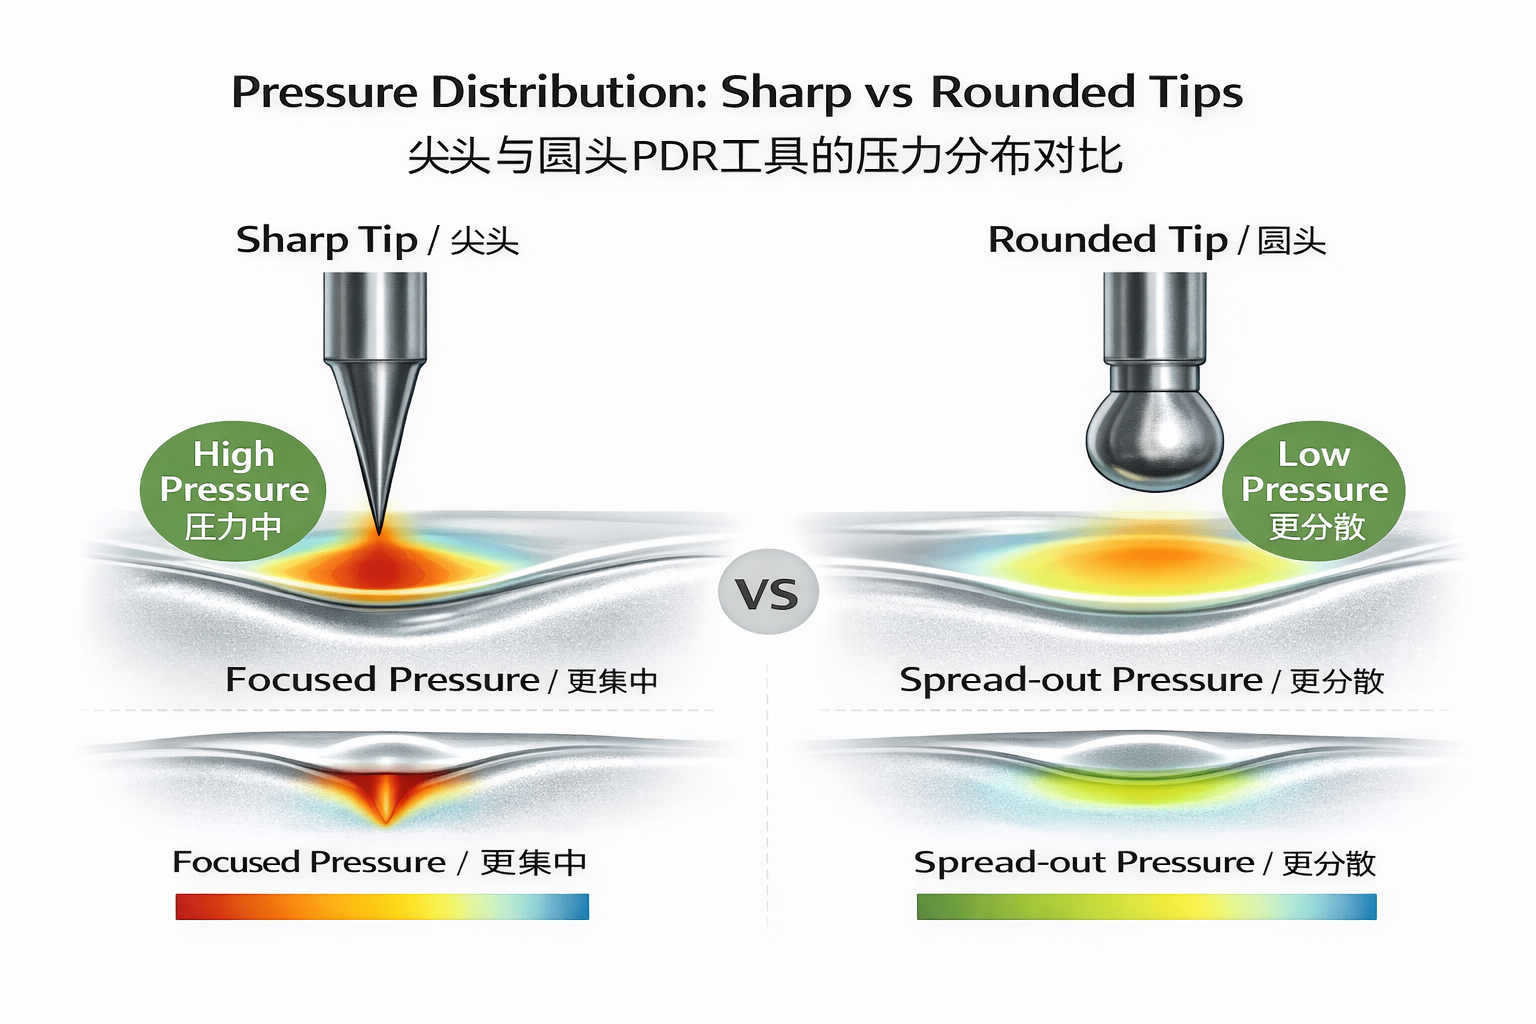
3.2 Tip control: pressure distribution
Tip shape changes pressure distribution:
- smaller tips concentrate force (fast but risky),
- larger tips spread force (smoother blending).
Choose tip geometry based on dent shape and stage of repair.
3.3 Stability reduces unwanted peaks
Most high spots come from unstable bracing, tool twist, and rushing. Improve stability before increasing force.
3.4 Micro-push workflow (repeatable)
- Establish stable brace point
- Use reading light to map the dent
- Apply micro pushes
- Recheck often
- Blend and finish
Checklist
- Stable brace point
- Tip matched to dent stage
- Micro pushes, not big pushes
- Frequent re-check under light
- Controlled finishing/blending
FAQ
Q1: Why do I create high spots?
A: Too much leverage, unstable support, or tip too sharp for the stage.
Q2: How do I improve control quickly?
A: Reduce leverage and commit to micro pushes with frequent rechecks.
Q3: Is stiff rod always better?
A: Not always—access and control determine the best stiffness.