

Quick answer
Select a PDR finishing tool by the surface feature being addressed, the contact shape and material, the available control, and the tool manufacturer's intended use. A knockdown, a replaceable tip, and a blending hammer are not interchangeable solutions to every high spot. Reassess the reflection after small, controlled work and stop when the surface or paint condition no longer supports the plan.
This guide is for trained technicians and professional buyers. It is not a striking-force chart or a substitute for practical instruction on customer vehicles.
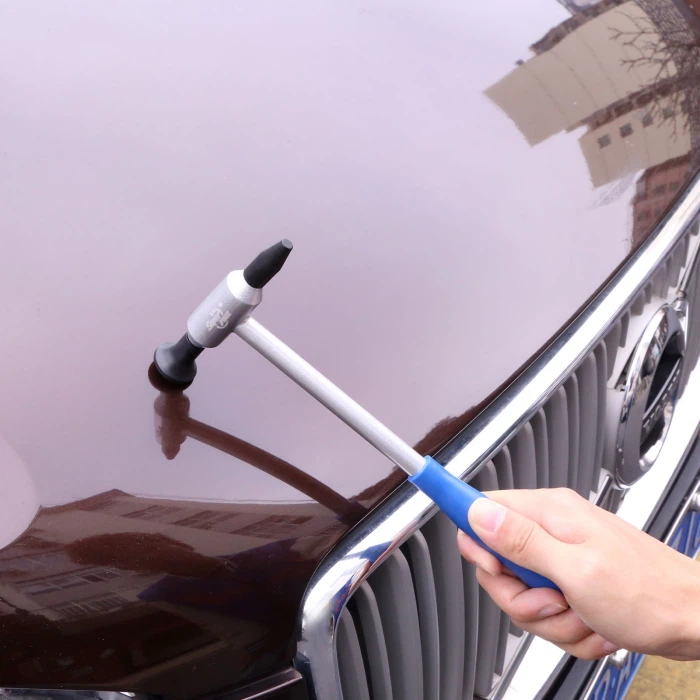
Establish what the reflection is showing
Before choosing a tool, distinguish the local feature from the surrounding panel shape. A visible high area may be part of a broader tension pattern, a previous overcorrection, or an observation affected by the light position. Changing tools before confirming the feature can compound an incorrect diagnosis.
Use a consistent reflection, inspect from more than one direction, and check the surrounding contour. Document pre-existing paint damage and conditions that make the intended process inappropriate. The pre-PDR paint inspection guide provides the earlier decision gate.
The immediate objective should be specific: evaluate a localized high, improve a transition on approved practice material, or compare the control of two compatible finishing assemblies. Finish this sentence before selecting the tool: the surface feature I am trying to change is…
Distinguish the tool functions
| Tool or component | Selection question | Boundary |
|---|---|---|
| Knockdown | Can the operator locate and control the intended contact precisely? | It does not diagnose whether the feature should be moved |
| Replaceable contact tip | Does its documented shape and material suit the intended tool and task? | Attachment fit does not prove impact suitability |
| Blending hammer | Does the complete tool provide the control needed for the taught finishing method? | It is not a shortcut for inexperienced correction of sharp defects |
| Protective or replaceable cover | Is it clean, intact, and approved for that contact? | A soft-looking cover does not guarantee paint protection |
| Supporting light setup | Can the operator observe the response between adjustments? | An attractive reflection from one angle is not final acceptance |
The table is a selection framework, not a list of universal repair instructions. The same tool can be appropriate or inappropriate depending on the panel, finish, operator, and sequence.
Contact geometry and condition deserve separate checks
Record the contact shape, working surface, material or covering, and intended tool family. Manufacturer catalogs distinguish these features for a reason. Dentcraft's interchangeable-tip information, for example, separates shape, working diameter, and finish. That classification demonstrates the need for precise component identification; it does not provide a compatibility approval for another brand.
Before use, inspect the contact area under adequate light. Remove a tool from the operation when there is an irregular edge, damaged covering, embedded contamination, uncertain attachment, or a changed working surface. Follow the manufacturer's maintenance procedure rather than reshaping or coating the tool without approval.
Do not assume that a larger or softer contact is always safer. The response depends on the complete interaction, and a contaminated surface can introduce a problem regardless of the label on the package.
Evaluate control on appropriate practice material
Use a securely supported practice panel with known condition and a suitable training task. Select a documented compatible assembly and establish a reference reflection. A qualified instructor or experienced evaluator should define what is being assessed and when the exercise stops.
Compare the operator's ability to place the contact, maintain visibility, control the tool, and identify the response. Record handling limitations rather than inventing a universal hammer weight or strike count. When two tools are compared, keep the exercise and observation conditions consistent.
Inspect the result from an additional direction. A change that appears favorable from the working position may reveal another surface feature elsewhere. Training evaluations should reward recognition of that uncertainty, not only speed of action.
Do not test an unfamiliar tip or technique on a customer's original finish simply because a product description calls it professional. Purchasing equipment and demonstrating competence are separate activities.
Integrate finishing into the repair sequence
Finishing should respond to the current shape and repair plan. It should not be an automatic final step performed with the same tool on every dent. Recheck the reflection after each meaningful adjustment and decide whether the next action still serves the intended result.
Where the repair includes glue pulling, the local response may depend on the preceding pull and surrounding contour. Consult pull direction and force control rather than treating finishing as compensation for uncontrolled pulling.
Stop and reassess if the surface behaves unexpectedly, the observed feature becomes less clear, paint damage appears, or access and visibility no longer allow controlled work. More repetitions do not establish that the original diagnosis was correct.
Illustrative purchasing comparison
A training center compares two finishing kits on the same supervised exercise. Kit A has more interchangeable pieces, but some lack clear identities and replacement references. Kit B has fewer pieces, each mapped to a documented tool and a defined exercise.
For that teaching program, B may be the more supportable purchase. The conclusion is about component control and curriculum fit, not proof that B produces better repairs in every technician's hands. If A's documentation is later resolved, it can be evaluated again.
This distinction matters to distributors as well. A high piece count is not a substitute for a clear explanation of what each contact is intended to do.
Define the order and the acceptance record
For the SuperPDR knockdown and tap-down tool listing, request the current supplied-component list, intended uses, replaceable-part identities, and maintenance instructions. Do not infer tip materials, thread compatibility, or impact ratings from photographs.
Keep the approved configuration with a handling assessment and receiving checklist. For repeat orders, compare the actual working contacts, not just the outer packaging. Route any unapproved substitution back to the supplier before putting it into a training or production kit.