Quick answer:
A hail PDR workflow should make a separate decision for every affected panel using five factors: paint/coating; metal stretch/geometry; panel material/construction; location/edge/body line/reinforcement; and safe access or controlled pulling route. Map and photograph the damage, confirm current vehicle procedures, assign a rod, glue, hybrid, or stop route, then work in a documented sequence and inspect under repeatable reflection. Stop for coating failure, severe stretch, uncertain material, unsafe access, blocked reinforcement, or unresolved highs and crowns.
Hail repair is a panel-level control process
Hail conditions vary by panel: a hood may have rear access, a roof may contain braces and nearby systems, and a rail may combine sharp geometry with restricted construction. One vehicle-wide repairability statement is too broad.
Before movement, record each panel's observations, procedure source, route, reassessment point, and exclusions. The Hail Damage Repair FAQ addresses map changes, access, documentation, timing estimates, and kit evidence.
Panel map and route decision table
Use one row per panel and add subareas when construction or damage changes within a panel.
| Map field | What to record | Route decision signal | Escalation signal |
|---|---|---|---|
| Panel and subarea | Hood, roof, decklid, fender, door, quarter, rail, body line, edge, brace zone | Defined area can be reinspected from the same reference points | Area cannot be isolated or involves unsupported structure |
| Paint/coating | Cracks, chips, lifting, prior repaint indicators, filler suspicion, finish change under reflection | Finish remains serviceable for the planned movement | Cracked, lifting, missing, or unstable coating |
| Metal stretch/geometry | Dent pattern, sharp centers, creases, highs, crowns, oil-canning, contour displacement | Lows and surrounding tension remain readable and controllable | Severe stretch, tearing, instability, or unresolved high/crown behavior |
| Panel material/construction | Identified material, reinforcement, adhesive, foam, bonded areas, prior repair | Current information supports the panel and proposed process | Material is uncertain or a required vehicle procedure is unavailable |
| Location/edge/body line/reinforcement | Edge, hem, ridge, brace, rail, opening, nearby safety-related area | Location permits controlled movement and inspection | Folded edge, inaccessible reinforcement, excluded structure, or lost contour control |
| Safe access or controlled pulling route | Existing access, trim plan, protected systems, rod route, outside-pull route | Rod, glue, or hybrid route is defined within applicable instructions | Unsafe trim, airbag, restraint, electrical, glass, or sensor exposure; route requires drilling or cutting |
| Documentation state | Before photos, map marks, procedure source, route, stop notes, final disposition | Record supports handoff and final comparison | Missing evidence prevents a defensible next step |
The five factors are applied at the panel level without substitution: paint/coating; metal stretch/geometry; panel material/construction; location/edge/body line/reinforcement; safe access or controlled pulling route. Intact paint on the hood does not establish roof repairability, and a rod route on one section does not authorize the same route through another brace zone.
Ordered hail damage workflow
The workflow below is a planning and documentation sequence, not a vehicle-specific repair procedure:
- Identify the inspection state. Record vehicle, panels, prior visible damage, trim, warning indicators, and reasons not to disassemble or move it.
- Clean for reliable inspection. Remove surface material without hiding coating damage or changing evidence. Do not begin glue work during mapping.
- Set repeatable reflection references. Record lighting position. A low generally spreads reflected lines; a high generally crowds them, subject to orientation, angle, and curvature.
- Map every affected panel. Mark dent regions, sharp centers, creases, crowns, edges, body lines, reinforcement zones, and non-PDR damage. Photograph the map and representative reflections.
- Apply the five-factor check per panel. Separate favorable, conditional, and stop areas. Do not average panel conditions into one vehicle-wide decision.
- Locate current vehicle information. Confirm relevant material, construction, foam, adhesive, corrosion, restraint, electrical, trim, and repair limits.
- Plan access before removal. Identify openings, protected paths, trim handling, nearby systems, and corrosion implications. Stop if no safe route exists.
- Assign rod, glue, hybrid, or escalation route. Tie each assignment to the mapped geometry, coating, location, and access facts. Record the reason rather than selecting by habit.
- Choose a panel and subarea sequence. Define boundaries that can be finished and reinspected. Keep completed and pending areas visibly separated in the map.
- Make controlled movements and update the map. Re-read coating, lows, highs, crowns, edges, and body lines after each stage. Record a route change or stop immediately.
- Restore and reassemble as required. Address corrosion protection, authorized trim, and nearby systems under applicable procedures.
- Document final QA. Inspect every area under original and additional angles, record unresolved conditions, and assign disposition.
Mapping damage without inventing precision
A map should let another qualified person identify panel boundaries, dent pattern, coating exceptions, construction limits, assigned route, procedure source, photographs, and final disposition. This guide prescribes no insurer code, count band, estimating formula, or repair time. Preserve stopped areas, prior conditions, and unresolved behavior as separate facts; documentation supports planning and QA but does not prove an outcome.
Choose a rod, glue, hybrid, or stop route
Rod route
Consider rear pressure only where existing access and current procedures permit controlled placement. Confirm backside path, clearance, construction, nearby systems, and corrosion protection; a reachable opening is not automatically safe.
I-CAR's PDR access-hole guidance says not to drill, remove foam for PDR, damage or elongate openings, or harm adjacent parts and finish. If reinforcement blocks a mapped low, assign another supported route or stop.
Glue route
Outside pulling may be considered where coating, tab contact, geometry, and procedures support it. I-CAR's Glue Pull Repair article supports tab planning, lifter, beam or slide-hammer roles, and knockdown work. It does not prove universal suitability, repaint adhesion, or elimination of finishing.
Hybrid route
A hybrid assignment uses outside movement and rear control at defined stages. Record each purpose, coating and crown check, and route-change signal.
Stop route
Assign a stop when no controlled route exists, material is uncertain, coating or geometry fails, construction excludes the process, or required vehicle information is unavailable. Keep the stop in the record.
Access, systems, and corrosion protection
Headliners, insulation, trim, lamps, glass-adjacent parts, wiring, airbags, restraints, sensors, adhesives, foam, and seals can affect a route. This guide authorizes no removal or universal disassembly order; follow current vehicle information.
Cái I-CAR OEM Technical Information Matrix is useful for locating manufacturer material, construction, foam, adhesive, corrosion, restraint, electrical, and repair information. It is an index, not repair permission.
I-CAR's corrosion-protection guidance after PDR says rod work may disturb backside E-coat or wax despite a protected tip. Inspect and restore applicable protection under vehicle-maker and product procedures; no one method fits every panel.
Rivian's Paintless Dent Repair statement is a named OEM example only. For covered Rivian vehicles and materials, it permits PDR within limits, requires paint inspection and system protection, prohibits access modification, and requires corrosion restoration. Its magnification, tooling, vehicle, scan, and material rules remain Rivian-specific.
Repair sequence and handoff controls
Choose panel order from repairability, access dependencies, trim planning, and stable QA rather than a universal roof-first or hood-first rule. Keep completed, pending, and excluded subareas distinct. Record every rod-to-glue route change or conditional-to-stop decision immediately.
Each handoff should state:
- which panels and subareas were inspected;
- which five-factor conditions passed, remained conditional, or failed;
- which vehicle information and product instructions were used;
- which access, trim, and corrosion actions were performed;
- which route, reassessment signals, pending areas, QA views, and dispositions were recorded.
Keep observed facts separate from expectations. Do not invent duration, success rate, labor saving, certification, warranty result, or restoration claims.
Labeled panel-level diagnostic scenarios
These scenarios illustrate decisions; they are not customer cases or reported results.
Scenario A: hood with mixed route zones
A hood has attached paint and identified construction, but one subarea has protected rear access while another lies over reinforcement. Assess the first for a rod route and the second separately for an outside pull. Stop if coating or crown behavior remains uncertain.
Scenario B: roof area with unsafe access uncertainty
A roof low appears shallow, but access involves unidentified electrical or restraint components. Keep it conditional while current vehicle information and a protected plan are obtained. Stop if information is unavailable or system risk remains unresolved.
Scenario C: sharp hail impact on a panel edge
A sharp low near an edge shows crowded reflection at its crown. Inspect coating, hem, stretch, and access independently. Glue pulling does not bypass edge risk; stop for unstable finish, a folded edge, blocked control, or unresolved crown behavior.
What the verified SuperPDR records support
These records identify products or components that may fill a planned workflow role. They do not establish panel repairability, procedure permission, force, speed, labor saving, coating preservation, or outcome.
| Verified first-party record | Listed fact | Bounded hail-workflow role | What the record does not prove |
|---|---|---|---|
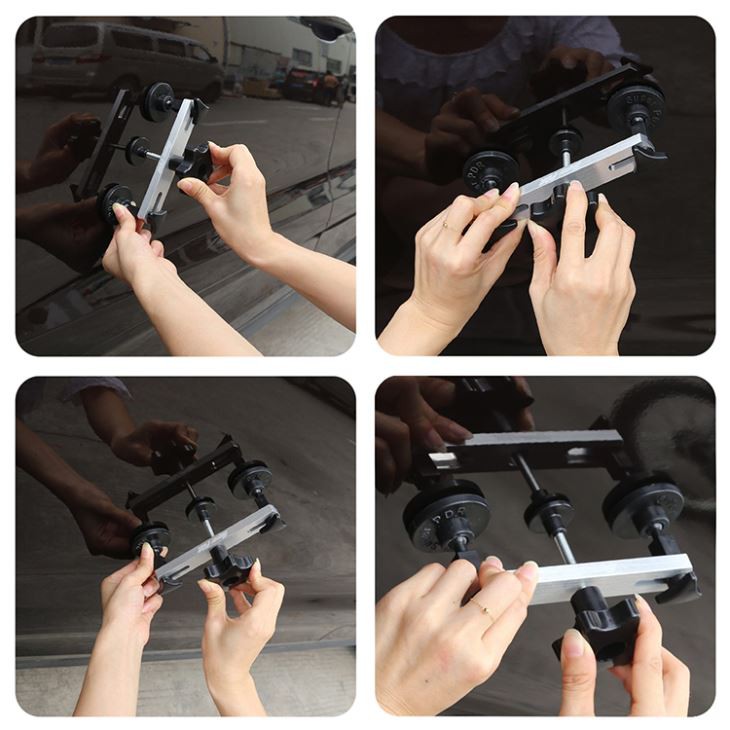
| MPT-Q013 hook rod set | Eight pieces; spring steel and plastic; 2 kg per set | Candidate rod inventory after a protected rear route is confirmed | Vehicle fit, precision, speed, or successful panel correction |
| MPT-Q014 adjustable hook rod set | Five pieces; spring steel and plastic; 2 kg per set; 360-degree adjustable rotation; extendable handle; replaceable lever rods; one-year listed warranty | Candidate configurable rod inventory where material, construction, and clearance permit | Approved tooling for a vehicle, access around a brace, durability, or outcome |
| MPT-T025 slide hammer | 423 g; 35 cm; steel and plastic; 12-month listed warranty; OEM/ODM service; one-piece MOQ | Candidate pulling role after tab, coating, geometry, and route planning | Pull force, attachment-inclusive weight, dent range, time saving, or finished quality |
| MPT-H100-1 knockdown | Aluminum and plastic; replaceable tips; listed for tap-down work | Candidate high or crown correction role under controlled reflection | Tip geometry, paint or texture preservation, precision, or a final result |
| Hail damage dent repair set, product 8904 | Visible packing list includes a dent puller, dent lifter, glue gun, ten glue sticks, 15 glue tabs, rubber hammer, and tap-down set with ten heads | Packing-list evidence for checking whether those listed items are present in a proposed outside-pull and tap-down setup | Kit completeness for a vehicle, component specifications, repair speed, labor saving, coating preservation, or outcome |
Final QA and acceptance record
Final QA starts from the original map. Inspect every area under the recorded reflection reference and additional angles. Check lows, highs, crowns, sharp centers, body lines, edges, coating, trim, corrosion work, and nearby systems.
Record each area as completed, conditional, excluded, or referred, including residual appearance or behavior. A completed row cannot override a visible defect or unresolved safety concern.
Stop and escalation conditions
Stop the affected panel or subarea and escalate when any of these conditions appears:
- paint/coating is cracked, lifting, missing, or unstable;
- metal has severe stretch, tearing, oil-canning, or unresolved high/crown behavior;
- panel material/construction is uncertain or a necessary vehicle procedure is unavailable;
- a folded edge, unsupported structure, bonded area, or inaccessible reinforcement blocks control;
- trim, airbag, restraint, electrical, glass, sensor, or other system risk is unresolved;
- the only apparent route requires drilling, cutting, modifying an opening, removing foam for PDR, or damaging adjacent parts;
- an outside pull cannot be supported by coating, tab, geometry, and product instructions;
- disturbed corrosion protection cannot be restored under applicable procedures;
- reflection becomes unreadable, panel response leaves the planned range, or final QA cannot account for every mapped area.
Keep the stop reason in the panel map. Do not replace it with a general statement that PDR always works on hail, aluminum, a roof, a body line, an edge, or intact paint.
Editorial review
- Super PDR: SuperPDR Editorial Team
- Review date: 2026-07-14
- Review basis: Editorially checked against I-CAR access-hole, corrosion-protection, glue-pull-planning, and OEM-information resources; the named Rivian PDR example; and the listed verified first-party product records. No individual technical reviewer is claimed.
- Revision note: Rebuilt as a documented panel-level hail workflow with five-factor mapping, route and sequence controls, evidence-limited product roles, final QA, and explicit stop or escalation conditions.